A kanban board is simple to use, but it can be a powerful tool for teams. A kanban board creates a visual workflow that illustrates how a team works together and how work is produced. Such workflows help teams improve productivity by providing a glimpse into efficiency at each project stage.
Historically, kanban was used in manufacturing and development teams, but managers across all industries have joined in the fun after seeing just how helpful the tool can be. In this article, we’ll show you how to set up a professional kanban workflow that will work wonders for your team.
Why Make a Kanban Workflow
When a workflow is represented visually on a kanban board, a team can learn loads of information about how they work together. Teams can see which stages of a project are efficient, where bottlenecks are occurring, and whether other team members might need help in order to keep things on track.
Kanban workflows offer an easy-to-read glimpse into work, so naturally, managers love them. Managers can monitor the workflow in real time to understand their team’s productivity, and then optimize their work processes for future projects.
Kanban workflows are also helpful for keeping stakeholders in the loop. Your boss won’t have to chase you down for a project update if they can simply look at the workflow and know exactly what’s going on in the project. Workflow management software makes this process even easier.
How to Make a Kanban Workflow in 6 Easy Steps
Kanban boards are deceptively simple. They are easy to set up, but first you have to understand the mechanics. Here’s how to create a kanban workflow.
1. Signup for a Kanban Tool
The first step in making your workflow is to sign up for kanban software. ProjectManager’s kanban tools are free for 30 days, so sign up for a free trial. You can try out the tools before having to pay any money or make any commitments.

2. Add Your Team Members
While kanban boards can be used to manage the work of a single person, they are extra helpful when used by a team. Once you are in the kanban software, you should invite all of your team members so that they can collaborate with you on your projects.
At this point, you can also invite any stakeholders that you’d like to keep informed. However, you may want to wait until your workflow is built out so that they have something to look at the first time they log in.
ProjectManager makes it easy to invite new people to your workspace at any time and offers different permission levels for each new team member. This gives you control over who sees what within the workspace.
3. Make a New Kanban Project
Once your team members have been invited to the workspace, you’ll need to create your first project to house the workflow. Navigate to the big green “+” in the top right corner of your screen and click it to add a new project. Give your new project a name, choose who will be working on this project and click “create project”.
All of your project details can be edited later, so don’t worry too much about getting this perfect. The most important thing is that you get a new project launched so you can begin building your workflow.
4. Add All of Your Tasks
Now that your new project is created, navigate to the “Board” tab in the menu to go to the kanban board view. This is where you will build out your entire kanban workflow.
On the default board screen, you’ll see three columns that are already built for you: To Do, Doing, and Done.
- To Do: This column will host all of the tasks that need to be done in order to complete your project.
- Doing: This column will show all of the tasks that are currently being worked on.
- Done: This column will show which tasks are complete.
Start by adding all of your team’s tasks to “To-Do”. Give each new task a name and create a kanban card for it. In our example, we’ll be creating a kanban workflow for a marketing team that has been asked to add two new web pages to their company website.
We’ve added two tasks called “New Webpage 1” and “New Webpage 2” to the To Do column. You should then click into each task and add a little bit more information about this task, so that team members have all of the information they need once they begin working. You can add a task description, start dates and due dates, and attach any necessary files.

5. Make Custom Columns
Now that a task has been created for each piece of the project, we can begin customizing the columns to fit our team’s workflow.
We know that we need to build two new web pages, but that’s easier said than done—there are many different people who will be involved with this project. Therefore, we’ll create custom columns to represent each stage of the creation process. The different stages of creation for a webpage are content writing and editing, design, publishing and promotion.
Since this kanban workflow will be more complicated than the standard three columns that are currently in place, we will update the columns. The old columns were
- To-Do
- Doing
- Done

But after we customize our project, the new columns are (from left-to-right)
- To Do
- Write and Edit Content
- Design
- Publish
- Promote
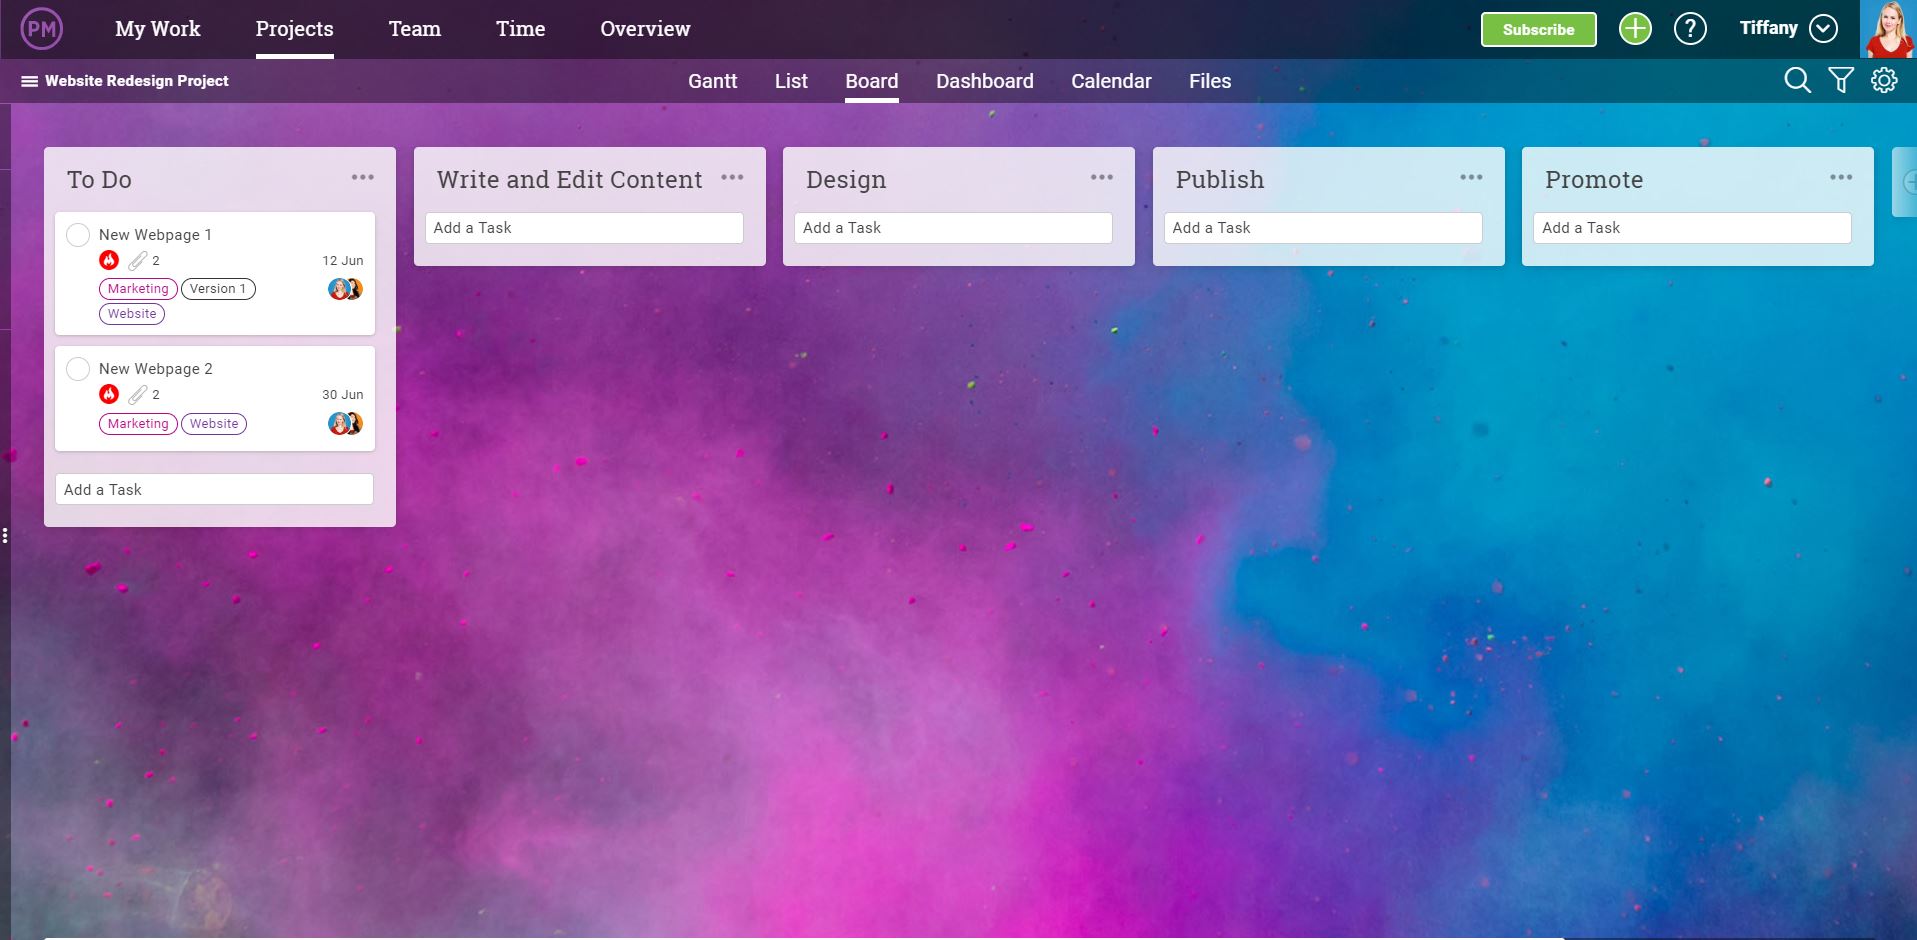
6. Assign the Work
Now that the project phases are created and ready to go, we can begin utilizing the workflow. Since the first thing needed in order to build a webpage is content, we’ll move “New Webpage 1” into the “Content” column and assign the task to the content writer. Once a task is assigned to a team member, they will receive an email notification letting them know to get to work.
The kanban workflow is now in action! After the content writer finishes their work, they can attach the content to the task, move the task into “Editing,” and re-assign the task to the editor. Once the editing is done, the task is moved to “Design” and so on until the webpage is done.
You’ll be able to see the task as it flows through the creation process, hence the name “workflow.”
Best Practices for Kanban Workflows
Once the workflow is up-and-running, it is important to keep an eye on it to make sure things are going smoothly. Sometimes you’ll find that you need to add a new column to the workflow if new people become involved, and the process becomes more complex.
It’s also important to keep an eye out for bottlenecks in the workflow. A bottleneck is where a project gets stuck and stops moving forward.
To use our example workflow again, maybe you notice that the two new webpages are due for publishing in three days, but both are still sitting in the “Design” column. In this case, your web designers might be overloaded with work, so you may want to see if another designer can help.
Related: 12 Resource Allocation Tips for Managers
This is why kanban workflows are so useful: they can help you catch problems as they happen, and prevent problems that could cause delays in project completion.
ProjectManager Takes Kanban Even Further
You can build all of your kanban workflows in ProjectManager to collaborate with your team and get more work done efficiently. Thousands of teams all over the world utilize our platform on a daily basis to stay organized and do amazing things.
In addition to kanban boards, ProjectManager also offers a whole suite of useful project management tools. These include Gantt charts for making project plans, timesheets for tracking time on work, and project reports for analyzing the productivity of a team.

ProjectManager is an award-winning tool that organizes teams and projects. Our cloud-based software gives you real-time data, so you can make better decisions and lead the project to a successful end. Try our kanban boards and see how we can streamline your workflow by taking a free 30-day trial.
